16 Apr How to Install Retractable Garage Door Screen?
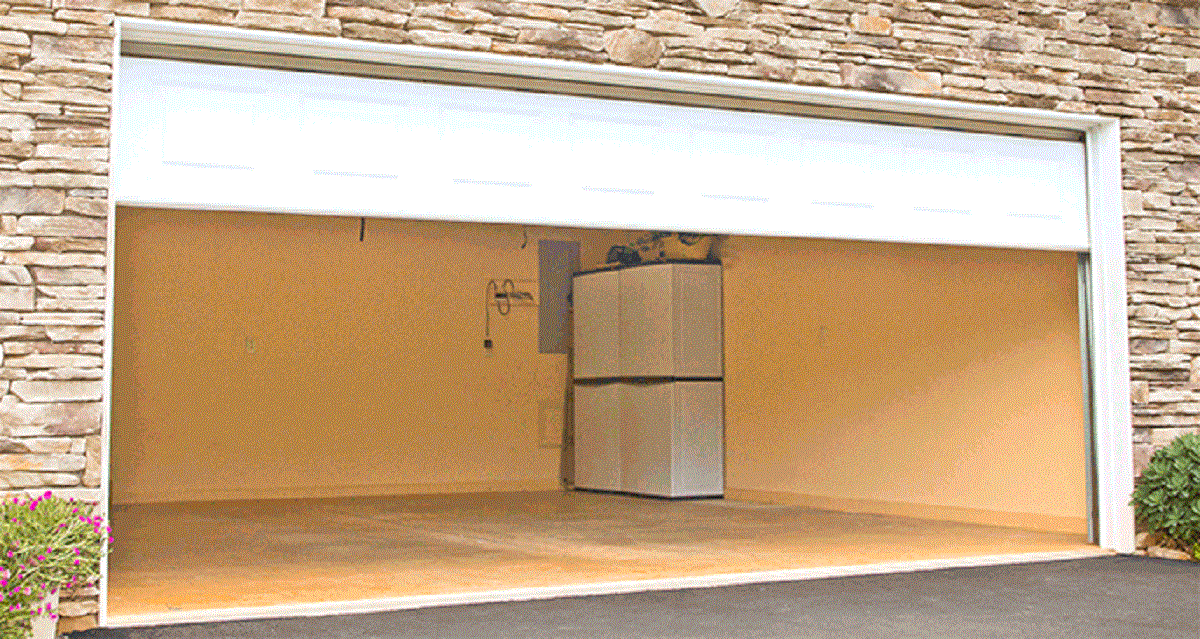
A retractable garage door screen is a beautiful addition to any home. It lets you enjoy fresh air ventilation on lovely days and keeps bugs and insects from flying and crawling into your garage. Installing a retractable screen on your garage door is a relatively straightforward DIY project that can be completed in the afternoon. Here is a step-by-step guide on how to install a retractable garage door screen.
Benefits of a Retractable Garage Door Screen
Before jumping into the installation process, let’s first go over some of the benefits of having a retractable screen on your garage door:
- Allows fresh air circulation – On lovely days, you can open your garage door without letting in bugs. The screen allows air to flow through while keeping insects out.
- Prevents bug intrusions – Flying and crawling insects are blocked from entering your garage, keeping it bug-free.
- Easy to open and retract – You can easily roll up the screen when you need full garage access. Retractable screens coil up into a cassette when not in use.
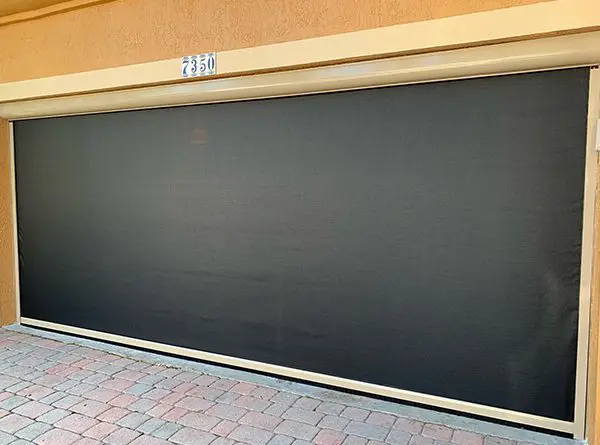
- Visibility – Unlike solid garage door screens, retractable screens are made from a strong mesh that provides visibility in and out of the garage.
- Customizable sizing – Retractable screens can be sized to fit any garage door opening. DIY kits come in standard widths that can be cut to your custom height.
- Aesthetically pleasing – A tight mesh gives a clean, streamlined look compared to bulky solid screens. The cassette housing has a low profile.
Now that you know the benefits, let’s go through the installation process step-by-step.
Step 1: Take Accurate Measurements
The first step is to measure the opening of your garage door to determine what size retractable screen you need. Here are the key measurements you need to take:
- Width – Measure the entire garage door opening width at the top, middle, and bottom. Use the smallest width.
- Height – Measure from the top of the opening to the floor. Round up to the nearest inch.
- Side room – Measure the amount of side room on each side of the opening if the screen will be mounted to the wall. Ensure at least 2 inches of clearance for the housing unit.
Once you have your measurements, you can use them to select the appropriately sized screen kit. Most kits come in standard width sizes that you cut to fit your custom height.
Also Read: How to Prepare 1200 Square Feet Buying Plan?
Step 2: Assemble the Housing Unit
Retractable screen kits consist of two main components – the housing unit and the screen material. Start by assembling the housing unit according to the manufacturer’s instructions. Here are the key steps:
- Lay out all the housing parts, including the cover, mounting brackets, and end caps.
- Piece the cover by sliding the side rails onto the front and back end caps.
- Attach the L-shaped mounting brackets to the top of the cover using screws.
- Install any tension adjusters, rollers, or guiders needed for your screen style.
- Set this housing unit aside for mounting once the opening is prepped.
The housing provides the protective outer casing for the screen material to coil around. Spend time ensuring this goes together squarely and securely.
Step 3: Prep the Opening
Now that the housing unit is built, you can move on to prepping the garage door opening for installation:
- Thoroughly clean the top of the opening using a degreaser if needed. Remove any dirt or debris.
- Place painter’s tape along the sides and top of the opening to protect the finish from scratches during installation.
- If mounting the housing to the wall, hold the unit in place and mark pilot hole locations using a pencil.
- Drill pilot holes for the mounting screws in the marked locations. Go approximately 1-2 inches deep.
Use a level to mount the housing straight and centered on the opening. Measuring and marking pilot holes accurately is critical to proper installation.
Step 4: Mount the Housing Unit
With the opening prepped, you can permanently mount the housing unit:
- Hold the unit centered above the opening using a helper or temporary support.
- Align the mounting brackets with your pre-drilled pilot holes and insert screws. Do not fully tighten yet.
- Check that the cover is mounted straight using a level on the side rails. Adjust as needed.
- Tighten all mounting screws securely once the unit is properly leveled and aligned.
If brackets do not align with your pilot hole locations, make slight adjustments by elongating the holes. Take care not to overtighten screws and warp the housing cover.
Step 5: Install the Screen Material
The housing provides the frame, while the screen material provides the retractable functionality. Follow these tips for installing the screen:
- Unroll the screen mesh and attach it to the roller bar using the provided spline cord. Cut to the proper height.
- Insert the ends of the roller bar into the cover side rails. Feed mesh into any tension adjusters or guiders.
- Attach stop caps to the ends of the roller bar. This prevents it from detaching from the cover.
- Insert any provided springs that help lift the screen. Attach to hooks on the roller bar ends.
- Feed the pull cord through the pulley system on the housing unit. Knot and hang at the desired length.
Test rolling the screen up and down several times before attaching any spring tension. Ensure the mesh rolls up straight without binding.
Step 6: Adjust and Test Operation
The final step is to test the operation and make any final adjustments:
- Roll the screen up and down several times. Make sure the mesh is winding evenly into the housing without rubbing.
- Adjust any provided tension knobs or springs so the screen operates smoothly with proper lift.
- Confirm the screen fully retracts into the housing with a couple of inches of overlap.
- Check that the pull cord fully retracts when the screen opens and closes neatly into the housing.
- Remove any painter’s tape from the opening once complete.
Tip: Run through several open and close cycles while monitoring screen operation. Catch any inconsistencies before finalizing the installation.
Once adjusted properly, you can enjoy years of smooth operation from your new retractable garage screen!
5 Helpful Maintenance Tips
To keep your new garage screen working optimally for years, follow these simple maintenance tips:
- Check for debris and damage – Inspect the mesh for any holes or tears. Brush off any stuck-on debris like leaves or dirt.
- Re-tension the screen – Over time, the mesh may need to be re-tensioned for proper spring retraction. Adjust tension knobs as needed.
- Lubricate the rollers – Keep the roller bars turning smoothly by applying lubricant to the ends at least once per year.
- Clean the mesh – Use a mild soap and water solution to clean the screen mesh gently if it becomes filthy.
- Check mounting hardware – Ensure all brackets and end caps remain securely fastened. Tighten any loose screws as needed.
Proper care and maintenance will ensure your garage screen gives you years of reliable daily service.
Frequently Asked Questions
Q: What material is best for the mesh – fiberglass or aluminum?
A: Fiberglass mesh is preferable for garage screens. It is more durable, flexible, and less prone to wrinkles than aluminum screening. Fiberglass also provides sharper outward visibility.
Q: Should I get a manual or motorized electric screen?
A: Manual pull-down screens are more straightforward and economical for most residential installations. Motorized screens are more costly but provide push-button convenience.
Q: How difficult is DIY installation?
A: Installing a retractable screen is considered an intermediate skill level. Some handyman experience helps, but complete garage door expertise is not required.
Q: Can I install the screen myself?
A: If you have good DIY abilities, installing a garage screen can be a do-it-yourself project. The instructions above provide all the steps needed. Have helpers for holding the screen unit during mounting.
Q: Will a garage screen provide UV protection?
A: Minimal UV protection is offered from standard fiberglass or aluminum meshes. For more excellent UV blocking, look for mesh specifically treated with UV inhibitors. This provides protection equivalent to SPF 30 sunscreen.
Conclusion
Installing a retractable garage door screen is a beneficial upgrade for any home. With this complete installation guide, you can add a screen to keep your garage free of insects and debris while enjoying ventilation. A well-installed screen with proper maintenance can provide years of reliable daily use. The project can be completed over 1-2 afternoons with basic skills. Make sure to accurately measure your opening, carefully assemble the housing unit, cleanly mount the hardware, and adequately tension the mesh. Regularly clean and check to ensure your new retractable screen glides smoothly for years.
Sorry, the comment form is closed at this time.