
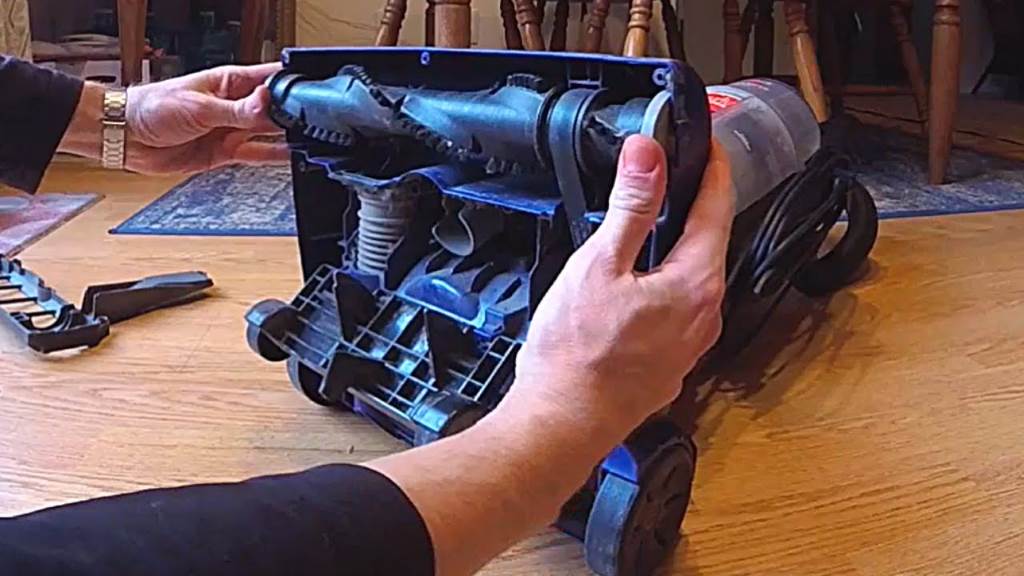
23 Jun How to Replace a Vacuum Belt (Step-by-Step Guide)
A vacuum cleaner is one of the most essential tools in any household. But over time, the vacuum belt can stretch, snap, or wear out—leaving your vacuum powerless. If your vacuum sounds normal but stops picking up dirt, chances are the belt needs replacing. The good news? Replacing a vacuum belt is simpler than most people think. Here’s how to replace a vacuum belt (step-by-step guide) and save money by avoiding costly repairs or replacements.
Why Vacuum Belts Matter
Vacuum belts drive the brush roll—the part that agitates carpet fibers to lift embedded dirt. Without a functioning belt, suction alone won’t deep-clean your floors. Most manufacturers recommend checking the belt every 6 months. According to Consumer Reports, a worn belt can reduce your vacuum’s efficiency by up to 30%.
Vacuum belts aren’t universal. They vary by brand and model, so always check your vacuum’s manual. Popular brands like Hoover, Bissell, and Eureka often have specific belt types.
Signs Your Vacuum Belt Needs Replacing
Here are the top indicators that your belt is due for a replacement:
- Burning rubber smell during use
- Brush roll not spinning
- Poor suction despite clean filters
- Unusual noises from the base
Experts recommend acting quickly. A damaged belt can stress the vacuum motor and lead to more expensive repairs.
Tools You’ll Need
Before diving into the process, gather these simple tools:
- Replacement belt (correct size for your vacuum model)
- Phillips or flathead screwdriver
- A clean cloth
- Scissors (optional)
You don’t need special skills—just patience and a clean workspace. Explore How Do I Cover My Basement Sewer Cleanout?
Step-by-Step Guide: How to Replace a Vacuum Belt
Step 1: Unplug the Vacuum Cleaner
This may sound obvious, but safety comes first. Always unplug the vacuum before opening any parts.
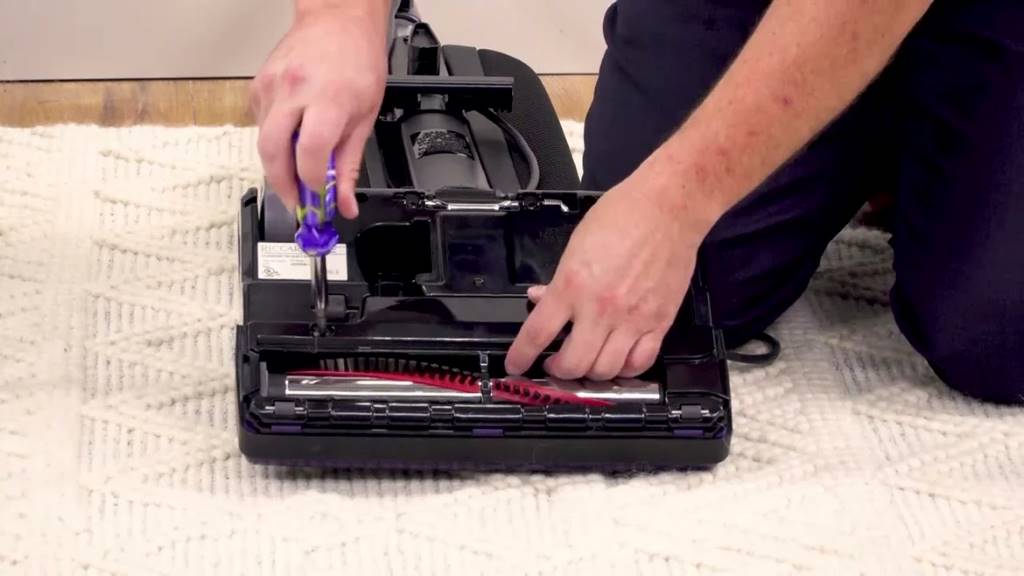
Step 2: Access the Brush Roll Area
Lay the vacuum flat and flip it over to expose the baseplate. Most vacuums have 4 to 6 screws securing the bottom plate. Remove them carefully and place them in a small container so you don’t lose any.
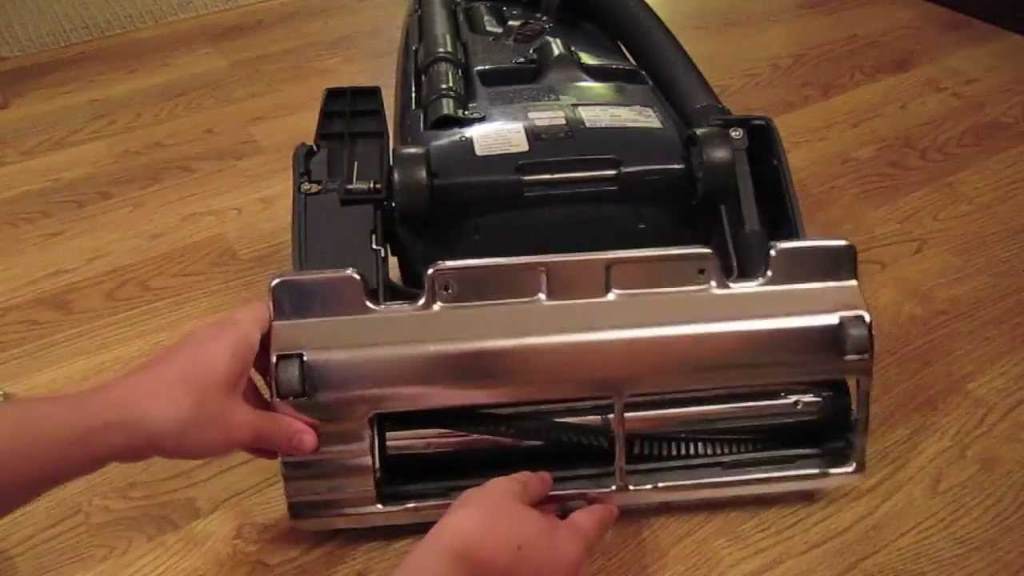
Step 3: Remove the Brush Roll
Gently lift out the brush roll. If it’s tangled with hair or debris, this is the perfect time to clean it. In many models, the vacuum belt loops around one end of the brush and connects to the motor shaft.
Step 4: Remove the Old Belt
Slide the old belt off the brush roll and motor spindle. It may be snapped or stretched beyond use. Either way, discard it.
Step 5: Install the New Belt
Slide one end of the new belt over the motor spindle. Then loop the other end around the brush roll. The belt should be snug—that’s a sign of good tension. If it feels too loose, you might have the wrong size.
Step 6: Reinstall the Brush Roll
Place the brush roll back in its housing. Ensure it spins freely but remains aligned with the belt. You may need to rotate it manually to get the belt seated properly.
Step 7: Reattach the Bottom Plate
Secure the baseplate using the screws you removed earlier. Make sure everything is tight and flush.
Step 8: Test the Vacuum
Plug the vacuum back in and run it for 30 seconds. Listen for smooth motor sounds and check that the brush is spinning properly. If everything works as expected, you’ve successfully replaced the vacuum belt!
Common Mistakes to Avoid
Using the wrong belt size: This is the most frequent issue. Always match the belt to your vacuum’s model number.
Forgetting to unplug: Electrical injuries can occur if safety isn’t prioritized.
Incorrect brush alignment: If the brush roll isn’t seated properly, it may not spin or could damage the housing.
A Reddit user shared how their vacuum stopped working after just 6 months. They were ready to throw it out but discovered the belt had stretched. Spending $6 on a replacement and 10 minutes fixing it saved them over $150 on a new vacuum.
Expert Opinions
Home appliance technician Mark Whitman explains, “Most consumers throw away working vacuums due to belt issues. Replacing the belt takes under 15 minutes and extends the vacuum’s life by years.”
According to The Spruce, replacing a vacuum belt regularly keeps it running at peak performance and ensures better carpet cleaning over time. Read more here
FAQs
1. How often should I replace my vacuum belt?
Every 6 to 12 months, depending on usage. If you vacuum daily or have pets, check it more often.
2. Can I use any vacuum belt?
No. Belts are model-specific. Using the wrong belt can cause damage or poor performance.
3. What if the brush roll still doesn’t spin after replacement?
Double-check the belt tension and brush alignment. If all else fails, the motor may be at fault.
4. Is it better to buy original brand belts or third-party?
Original belts guarantee fit and performance, but some third-party options work well. Read reviews before buying.
5. Can I extend the belt’s life?
Yes. Clean debris from the brush roll regularly and avoid vacuuming large objects that can stress the belt.
6. What’s the cost of replacing a vacuum belt?
Most belts cost between $4 and $12. Compare that to the cost of a new vacuum—often over $100.
7. Should I replace the brush roll at the same time?
If the bristles are worn or uneven, it’s wise to replace both for optimal performance.
Final Thought
Knowing how to replace a vacuum belt (step-by-step guide) empowers you to maintain your vacuum cleaner without professional help. It’s a straightforward repair that can dramatically improve cleaning performance. Ignoring a broken belt not only reduces cleaning efficiency but risks damaging your appliance over time. With just a few tools and a bit of patience, you can keep your vacuum in top shape and save money in the long run. Regular maintenance ensures your floors stay spotless and your vacuum lasts for years.
Sorry, the comment form is closed at this time.