12 Feb How to Change a Toilet Seat? The Ultimate Step-by-Step Guide
Remove the old seat using a screwdriver and pliers to change the toilet seat. Place the new seat in position and secure it with the provided hardware.
Changing a toilet seat is a simple process that can be completed in just a few steps. Whether you’re updating the look of your bathroom or replacing a damaged seat, following these instructions will help you successfully change a toilet seat.
With the right tools and a little time, you can install a new toilet seat and be ready for use in no time. This practical guide will walk you through the process and ensure your toilet seat replacement goes smoothly.

Choosing The Right Toilet Seat
When upgrading or replacing your toilet seat, choosing the right one is essential for comfort and aesthetics. Here’s how to make the best choice for your bathroom.
Measure Your Current Toilet Seat
To ensure you select the right size, start by accurately measuring your current toilet seat. Use a tape measure to determine the length and width of the seat. Standard toilet seats typically measure 16.5 inches in length and 14 inches in width, but verifying these dimensions before purchasing a new seat is crucial.
Consider Material And Style Options
When choosing a toilet seat, it’s essential to consider the material and style that best complement your bathroom decor. Popular materials for toilet seats include plastic, wood, and cushioned vinyl, each offering unique advantages. Plastic seats are known for their durability and ease of cleaning, while wood provides a classic look and cushioned vinyl offers additional comfort. However, it’s important to be aware of issues such as toilet seat peeling, which can affect the appearance and hygiene of the seat over time. Exploring the various style options, such as elongated or round seats, allows you to select one that suits your preference and existing bathroom design. For a wide selection of materials and styles, Beebuze can be a valuable resource to find the perfect fit for your needs, ensuring you make an informed decision that enhances both the functionality and aesthetic of your bathroom.
Check Compatibility With Toilet Bowl
Before purchasing, verify that the new toilet seat is compatible with your toilet bowl. Some toilets require specific sizing or mounting systems, so ensuring that the seat you choose will securely fit your toilet is essential. Refer to the manufacturer’s guidelines or consult a professional to confirm compatibility.
Gathering The Necessary Tools And Equipment
When replacing a toilet seat, the first step is to gather the necessary tools and equipment. This ensures the process goes smoothly and efficiently. Below are the essential items you’ll need to complete the replacement:
Tool 1: Adjustable Wrench
An adjustable wrench is crucial for loosening and tightening nuts and bolts. It allows you to adjust the size of the fasteners on the toilet seat, making it a versatile and handy tool for this project.
Tool 2: Screwdriver
A screwdriver, whether it’s flathead or Phillips, is essential for removing the screws that secure the old toilet seat. It is vital to have the correct type and size of screwdriver to avoid damaging the screws or the area around them.
Tool 3: Safety Gloves
Always prioritize safety when working on home improvement projects. Safety gloves protect your hands from potential cuts and scrapes, as well as from any germs or substances that may be present when removing the old toilet seat.
Equipment: New Toilet Seat
The most essential equipment you’ll need is the new toilet seat. Ensure you have the correct measurements for your toilet bowl and that the seat is compatible with your toilet model. This will guarantee a snug and secure fit for the replacement.
Removing The Old Toilet Seat
| Step 1: Locate the Hinge Caps |
| To remove the old toilet seat, you must locate the hinge caps. These small covers hide the hinges connecting the seat to the toilet bowl. Hinge caps are usually situated in the back or front of the seat. |
| Step 2: Remove the Hinge Caps |
| Once you have located the hinge caps, use your fingers or a flathead screwdriver to pry them off carefully. Hinge caps can be pretty snug, so apply gentle pressure to avoid damaging them or the toilet seat. Set the hinge caps aside, as you will need them for reinstallation later. |
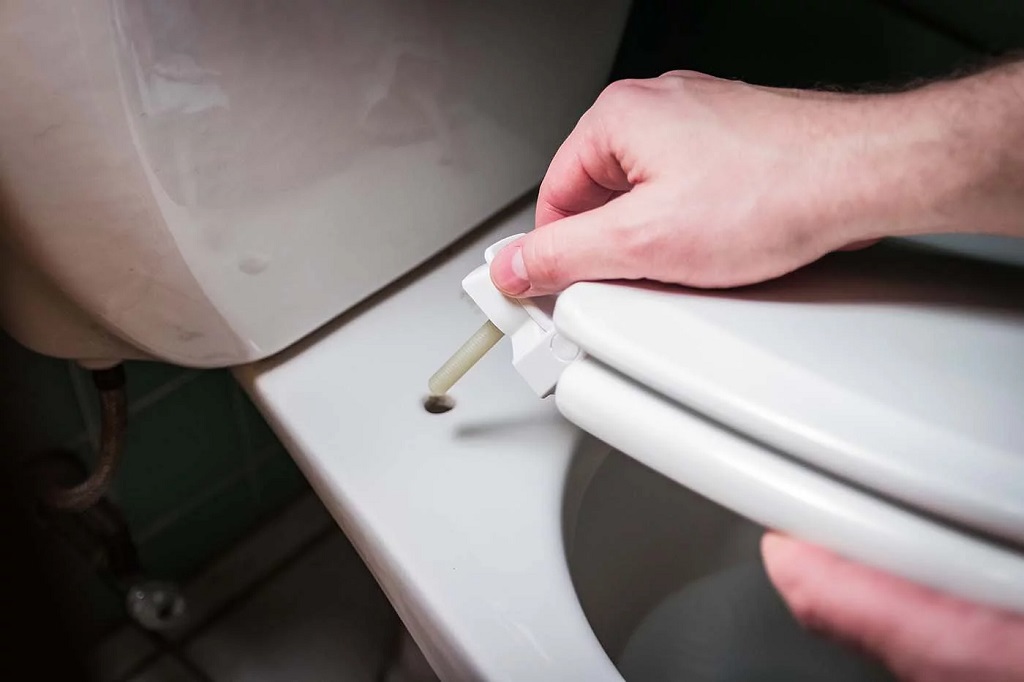
| Step 3: Unscrew the Mounting Bolts |
| After removing the hinge caps, you will find the mounting bolts underneath. These bolts secure the toilet seat to the toilet bowl. Locate the mounting bolts and use a screwdriver or a wrench to unscrew them in an anti-clockwise direction. Keep a firm grip on the bolts to prevent them from falling into the toilet bowl. |
| Step 4: Lift and Remove the Old Seat |
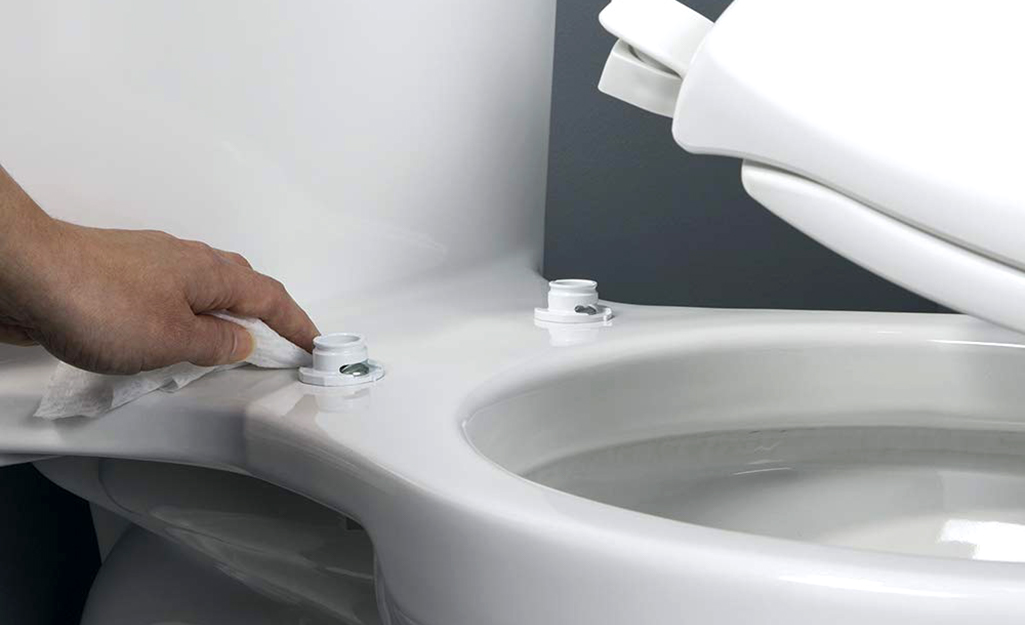
| Once the mounting bolts have been fully unscrewed, it’s time to lift and remove the old seat. Gently lift the seat upwards, ensuring you support it with both hands. Carefully remove the old seat from the toilet bowl and set it aside for disposal or recycling.
Remember to clean the area underneath the old seat before installing the new one. Wipe away any dirt or debris using a damp cloth or disinfectant to ensure a clean surface for the new seat. |
Removing the old toilet seat is the first step in replacing it with a new one. This process involves locating the hinge caps, removing them, unscrewing the mounting bolts, and finally lifting and removing the old seat. Each step is crucial to ensure a smooth and successful removal process without causing any damage.
Following the above steps, you can easily remove an old toilet seat and prepare your bathroom for a fresh, clean replacement. Remember to handle all parts and tools carefully and dispose of the old seat according to local waste disposal regulations.
Installing The New Toilet Seat
Installing a new toilet seat is a simple task that can give your bathroom a fresh and updated look. These step-by-step instructions will guide you if you’re looking to replace a worn-out seat or switch to a different style. This section will cover everything from orienting the new seat to testing its stability. So, let’s get started with installing the new toilet seat!
Step 1: Orient The New Seat
Before installing the new toilet seat, you must ensure it is positioned correctly. Start by removing any packaging and placing the seat upside down on a clean surface. Check the underside of the seat for any arrows or markings that indicate the front or top of the seat. Align these markings with the front of the toilet bowl for proper orientation.
Step 2: Insert The Mounting Bolts
It’s time to insert the mounting bolts with the new seat adequately oriented. Locate the holes in the back of the toilet bowl where the old seat was attached. Take the mounting bolts with the new seat and insert them into these holes, ensuring they are facing upward. Make sure the bolts are centered and evenly spaced to ensure stability.
Step 3: Tighten The Mounting Bolts
Once the mounting bolts are inserted, it’s time to secure the new seat to the toilet bowl. Begin by tightening the nuts onto the bolts using a wrench or pliers. Be careful not to overtighten, as this can cause damage to the toilet bowl. Keep pulling until the seat feels secure and doesn’t move when applying pressure.
Step 4: Attach The Hinge Caps
You’ll want to attach the hinge caps to give the toilet seat a polished look. These caps cover the mounting bolts and provide a finished appearance. Snap the caps over the bolts, ensuring they are aligned with the seat and securely attached. This step adds a touch of elegance to your newly installed toilet seat.
Step 5: Test The Stability
After completing the installation, it’s essential to test the stability of the new toilet seat. Sit on the chair and apply gentle pressure to ensure it doesn’t wiggle or shift. If the seat feels loose, tighten the mounting bolts until secure. Double-check the stability before finishing your installation process.
Additional Tips And Considerations
When changing a toilet seat, you should keep a few additional tips and considerations in mind. These can make the process easier and help you choose the right seat for your toilet. Here are some valuable points to consider:
Tip 1: Clean The Toilet Bowl
Before replacing the toilet seat, cleaning the toilet bowl thoroughly is essential. This ensures you have a clean surface to work with and helps prevent any lingering odors. Use a toilet bowl cleaner and a brush to scrub the bowl, paying attention to any stains or buildup. Rinse the bowl thoroughly to remove any residue, and dry it completely before moving on to the next step.
Tip 2: Follow Manufacturer’s Instructions
When purchasing a new toilet seat, it is crucial to follow the manufacturer’s instructions carefully. Each toilet seat may have specific installation requirements to ensure a secure fit. These instructions will guide you through the process, providing step-by-step directions for removing the old seat and installing the new one. Following these instructions will prevent any potential installation errors and ensure a proper fit.
Consideration: Universal Vs. Specific Fits
When choosing a new toilet seat, you’ll come across options for both universal and specific fits. Adaptable seats are designed to fit most standard toilets, while specific-fit seats are customized for particular toilet models. It’s essential to consider your toilet type and choose a seat that matches its dimensions and shape. By doing so, you’ll guarantee a perfect fit and avoid any discomfort or instability. Refer to your toilet’s user manual or measure the dimensions of your toilet bowl to determine the correct seat size and shape for your toilet.
Frequently Asked Questions On How To Change A Toilet Seat
How Do You Remove A Toilet Seat?
To remove a toilet seat, start by locating the two bolts or screws that hold it in place. Use a wrench or pliers to loosen and remove the bolts by turning them counterclockwise. Once the bolts are removed, lift the old seat off the toilet bowl.
How Often Should You Change A Toilet Seat?
It is generally recommended that a toilet seat be changed every 5 to 8 years, depending on its condition and usage. Over time, a toilet seat may become worn, discolored, or have loose hinges. Changing it regularly ensures cleanliness, comfort, and proper function.
What Tools Do You Need To Change A Toilet Seat?
To change a toilet seat, you will need a wrench or pliers to loosen and remove the bolts, a screwdriver to attach the new seat, and possibly a brush or cleaning agent for sanitation. Ensure you have the correct size and type of tools for your toilet seat.
Conclusion
To sum up, changing a toilet seat is a simple process that anyone can handle. You can replace your toilet seat efficiently and effectively by following the steps outlined in this blog post. To expedite your toilet’s flushing speed, start by gathering the necessary tools, preparing the area, and carefully removing and installing the new seat, ensuring optimal functionality for a quicker flush.
With patience and attention to detail, you’ll have a brand-new toilet seat in no time. Happy DIY-ing!
Sorry, the comment form is closed at this time.