18 Jan How to Replace Door Frame?
Replacing a door frame may seem daunting, but with the right tools and techniques, it can be accomplished as a DIY project. Whether you need to return an old, worn-out door frame or want to upgrade to a more modern style, this step-by-step guide will walk you through the entire process.
If you’ve noticed a vertical crack above the door frame, addressing this issue is crucial before proceeding with the replacement. Begin by examining the extent of the crack to determine whether it’s a superficial cosmetic concern or a structural problem that needs immediate attention. Once you’ve assessed the situation, you can incorporate the necessary repairs into the overall door frame replacement process.
Why Replace a Door Frame?

There are several reasons you may need or want to replace a door frame:
- Old and worn out – Door frames can warp, crack, and become damaged over time. Replacing it can restore functionality and aesthetic appeal.
- Updating style – Installing a new door frame is an easy way to update the style and look of a room without a major renovation.
- Improved security – A sturdy, well-installed door frame helps improve security and prevent kick-ins.
- Increasing home value – Replacing an outdated or damaged door frame can increase your home’s value and appeal to buyers.
- Energy efficiency – New door frames can seal better, preventing drafts and helping insulate your home.
- Accessibility – Adjusting the height and width of a door frame can improve accessibility and accommodate wheelchairs.
Preparing for the Project
Before you get started on removing the old frame and installing a new one, there are a few essential steps to take to set yourself up for success:
Gather Tools and Materials
You’ll need the following tools and materials:
- Pry bar
- Hammer
- Flat bar
- Utility knife
- Tape measure
- Level
- Wood shims
- Screwdriver and screws
- Drill
- Door frame (sized appropriately for the door)
- Wood putty
- Insulation foam
Protect Surrounding Areas
Since this project will generate dust and debris, protect nearby furniture, walls, and floors by covering them with plastic sheeting or tarps.
Remove Door
Start by removing the existing door from the frame using a screwdriver. Set the door aside very carefully to prevent damage.
Check Measurements
Buying a replacement door frame with measurements that match your existing opening is crucial. Measure the width at both the top and bottom of the frame and the height on both sides. This will determine whether you need to adjust the rough opening.
Removing an old doorframe

With your prep work completed, removing the old door frame is time. Take care not to damage the surrounding drywall in the process.
Pry Off Casing
Use a pry bar to pry off the door casing gently. The casing is the trim that covers the inside edges of the frame. Slow and steady pressure is critical to avoid cracking the trim or drywall.
Pull Out the Remaining Nails
Pull out any remaining nails from the old frame using a flat bar or hammer to detach it from the rough opening completely.
Cut Through Caulk or Construction Adhesive
Caulk or construction adhesive is likely sealing the perimeter of the old door frame to the rough opening. Use a utility knife to cut through this seal.
Remove Frame
Work the frame loose, then lift it out of the opening. Be sure to use proper lifting techniques to avoid injury.
Clean Rough Opening
Remove any leftover debris, nails, or old caulk from the rough opening. Use a shop vac or broom to ensure the opening is clean for your new frame.
Preparing and Adjusting the Rough Opening
Now that the old frame is removed, the rough opening likely needs adjustments to ensure a proper fit and successful installation.
Check for Level and Plumb
Use a level to check that the rough opening is plumb (vertical) and level (horizontal). If it is not, use wood shims to adjust as needed.
Adjust Size if Needed
If your measurements determine the new frame needs a slightly larger or smaller rough opening, use a drywall saw to cut and expand the opening accordingly.
Check the Condition of Jack Studs
Examine the jack and king studs on either side of the rough opening. These vertical studs must be secure and upright to support the new frame properly.
Replace Jack Studs if Needed
Use spare lumber and wood screws to replace any damaged or compromised jack studs on either side of the rough opening.
Installing the new doorframe
You’re now ready to put in the new door frame following these steps:
Dry Fit the Frame
Before permanently installing, do a dry fit by placing the new frame into the rough opening without fastening it. Check for any gaps or interference.
Shim Accordingly
If gaps exist between the new frame and rough opening, use tapered wood shims to take up space to achieve an accurate fit.
Fasten One Side
With the frame shimmed for a good fit, partially fasten one side by driving 3-inch screws through the frame into the king stud. Do not over-tighten.
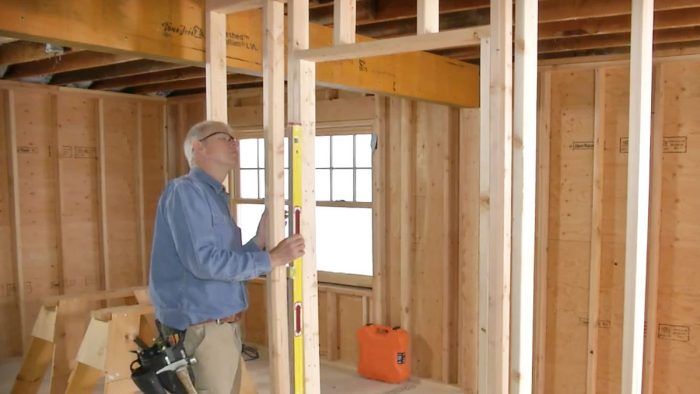
Plumb and Fasten the Other Side
Use a level to ensure the frame is perfectly plumb. Then fasten the other side just as you did the first, driving screws into the king stud.
Check Level at the Top
Use a level to check the top of the frame is level horizontally. Shim and adjust if needed.
Fasten Top Screws
Drive screws through the top frame header into the jack studs on either side. Insert shims above the screw holes as needed to prevent distortion.
Re-check Level and Plumb
Verify the entire frame is level horizontally and plumb vertically. Make any final adjustments needed with shims.
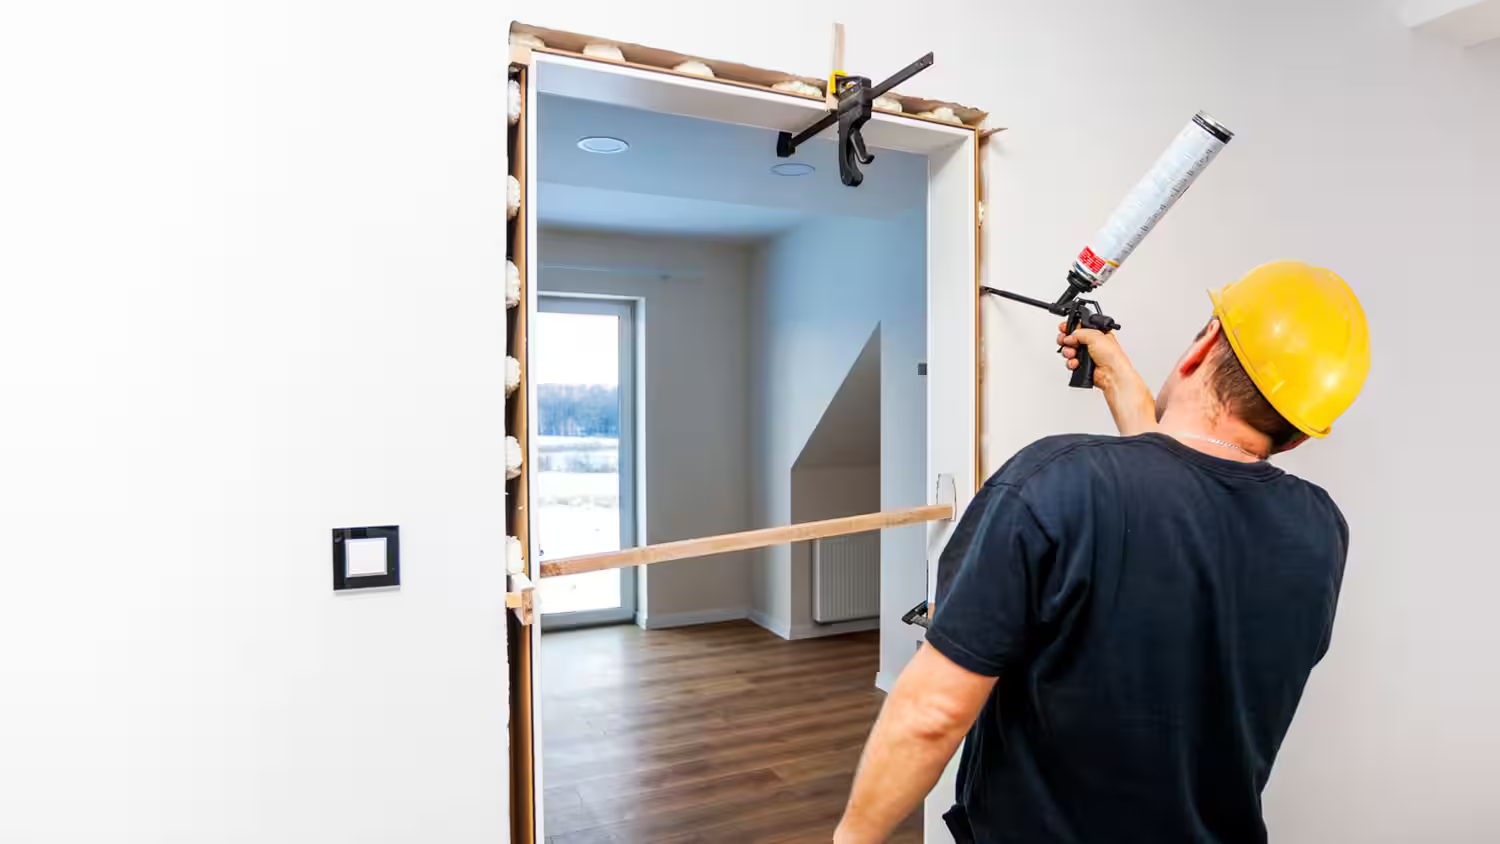
Insulate Gaps
We are expanding insulation foam into gaps between the frame and rough opening to insulate and seal. Allow foam to fully cure before trimming excess.
Finishing Touches
You’re in the home stretch! Apply the final touches for a complete professional look:
Hang Door
Re-hang the door in the new frame using hinges and hardware according to manufacturer instructions.
Re-install Casing
Cut replacement casing pieces to size if needed and secure them into place around the frame. Nail into the wall studs, not just the jamb.
Caulk Perimeter
Apply a smooth bead of paintable caulk around the interior perimeter of the frame for a seamless look and draft prevention.
Fill Holes
Use wood putty to fill any nail holes, cracks, or defects in the frame. Allow to dry completely.
Sand and Paint
Lightly sand the door frame. Then, paint or finish the frame and casing to match your interior. Allow the paint to cure fully.
Seal Exterior if Needed
If exterior brick molding was removed, be sure to properly flash and seal the outer perimeter of the frame to prevent water intrusion.
Add Door Stops
Screw or nail door stops into place on the frame to prevent the doorknob from hitting the wall.
Tips for a Successful Installation

Follow these tips to ensure your door frame replacement project goes smoothly:
- Measure twice, cut once – Accurate sizing is crucial, so measure thoroughly before cutting or installing anything.
- Use shims generously – Don’t be afraid to use plenty of shims to achieve a level, plumb, square fit.
- Work slowly – Rushing through steps can lead to mistakes. Take it slow and steady.
- Check level and plumb often – Continuously verify the frame is oriented correctly as you install.
- Follow manufacturer instructions – Consult the door frame maker’s guidelines for detailed specifications.
- Get help for heavy lifting – Don’t risk injury. Get an extra set of hands to lift and position the frame.
- Let materials fully cure – Allow caulk, putty, paint, and foam to fully dry before moving on.
FAQs
How long does it take to replace a door frame?
With proper preparation and tools, an experienced DIYer should be able to replace a door frame in 2-5 hours, depending on size.
What tools do I need to replace a door frame?
You’ll need a pry bar, hammer, utility knife, tape measure, level, screwdriver, shims, and drill. A reciprocating saw can also be helpful.
What is the best material for an interior door frame?
Wood is generally the best choice as it’s affordable, accessible to work with, and provides a secure attachment. Metal frames are also very durable.
How much does it cost to replace a door frame?
The cost for just the materials ranges from $50-200. Pre-hung door units with both frame and door can cost $200-600.
How do I measure for a new door frame?
Use a tape measure to measure the height on both sides of the frame and the width at both the top and bottom. Compare these measurements against the frame size you intend to purchase.
Should I buy a pre-hung door or install the door separately?
Pre-hung door units with both the frame and door already assembled are easier to install but limit customization. Buying them separately requires more work but allows you to choose the door style you want.
How do I remove the old frame without damaging the drywall?
Work slowly and carefully when prying off the frame to limit drywall cracks. Use a utility knife to cut through any caulk first. Protecting the walls with plastic sheeting can also prevent damage.
Can I install the new frame directly into the old frame’s opening?
It’s best to remove the old frame entirely first. Then, you can address any issues with the rough opening, shim adequately, and ensure a solid attachment for the new frame.
What kind of screws should I use to install a door frame?
Opt for 3 to 3-1/2 inch wood screws. Make sure they are countersunk screws with wide threading to hold securely in the framing studs.
Conclusion
While removing an old door frame and installing a new one takes time and physical effort, it is an achievable DIY project for an experienced homeowner. Installing motorized outdoor roll-up sun shades with precision and the appropriate tools ensures a seamless and professionally executed enhancement to your outdoor space. Pay close attention to precise measurements, adequate shimming, maintaining level and plumb orientation, and sealing the perimeter. With patience and hard work, you can give any room an updated look with a new door frame.
Sorry, the comment form is closed at this time.